Tuesday, 10 March 2015

Budgeting for the photographic shoot!

Budgeting...

So for the shoot I didn't really want to spend money and normal shoots usually cost about £500, which obviously I don't have the budget for. So I decided to post an advertisement on Starnow, clearly stating a collaboration between myself, the model and the photographer, therefore no money involved.

I was surprised at the amount of applicants!


My listing on Starnow for a model and photographer
In my advertisement I said a studio space was preferred. I found a photographer who had a studio in Goldhawk road in Hammersmith, so I just had to cover travel costs for my self which is £5 return.


Props I used for the shoot

I bought 2 flower props for the shoot which came to £3. I didn't need to get any additional make up as I had everything I needed in my kit. 

I made sure that I had made clear that they would be credited wherever I put the photos and we can all have copies. 

I'm so pleased I managed to get everything sorted within a tiny budget!


Monday, 9 March 2015

Final images!!!

My Final Images no retouching...


My chosen photos retouched....


I liked these images but felt the face was too serious for the magazine I wanted to portray.


This image was a very close call to being 'the chosen one' but I just felt the rose in front of the eye tied my look together, especially as D&G SS15 was my main make-up inspiration and the rose featured on the runway!


'The Chosen One!' as soon as this shot was taken I kind of just knew that was the shot. When you know you know. I just love everything about it. My model was so good at following direction and when I told her just let loose have a bit of fun and be a bit cheeky, this was one of the faces and I loved it! I think the make up and hair are shown off in it, whilst embracing the i-D of the magazine, which is why I chose it!!


I think this is a gorgeous shot, just not a cover shot, it's almost quite sad, so not the happy, cheeky vibe I wanted!


I loved this shot too but obviously her eyes are wide open so I couldn't really use it, also it's too close up to be able to put font over it to turn it into a cover shot!


This image was in my top 3, the only thing that stopped me was the hair band on the wrist!! I can't believe I didn't notice it in the shoot itself!! Thank goodness it wasn't my favourite one!!


Photgraphy and retouching: Pedro Garcia
Model: Elizaveta Luneva
Hair, makeup & styling: Me 

My Final image:


I added in the font myself using power point and then saved the slide as a JPEG file. I took the bar-code off Google images, to add in that extra authenticity.
I am really happy with my final image, I think I have achieved the spirit of the magazine, I wanted my image to come across as cheeky, fun, flirty, whilst still remaining beautiful. I have really enjoyed this project, although the thought of it when our briefs were handed out was so daunting, it has really helped me in gaining confidence and having a little more self belief.

03.03.15 catwalk workshop, sequins, glitter, feathers etc....

03/03/15, fashion make-up, texture make-up....

What you’ll need:

    Feathers, glitter, sequins, and gems whatever you want   really.

Makeup forever flash palette this product is amazing you can mix any skin tone with it, also the bright colours have such great pigment so they’re really vivid! Also a little product goes a long way!

Cleanser/toner/moisturiser

Eyelash glue/hydro spirit gum - great product as you can wash off using water.

Foundation selection, I used MAC studio fix fluid, which is a great med-full coverage foundation but you can easily make it a look like a lighter coverage by really buffing it in.

Brush kit

IPA

Mascara

Face paints/make up forever flash palette

Step-by-step:

cleanse, tone, moisturise

Apply a full coverage foundation

Branka use a Makeup forever flash palette to create a freestyle look, for every colour used (Branka used hot pink, bright yellow and turquoise) she changed brushes. The look was very abstract and avant garde, she told us to just go with the flow and be free.

Branka used hydro spirit gum which is water soluble, so great for glitter, you can also use it on children and in the hair. Apply the spirit gum to where you want the glitter using your finger. Apply glitter with the same finger as it will have become tacky, helping you to pick up the glitter.

Apply gems or whatever else you want using liquid latex, as its stronger than hydro spirit gum therefore it will ensure the gems stay on.

Branka then applied silver leaf to the eyelid, she did this by applying hydro spirit gum to the centre of the lid, letting it become tacky for a bit, then used tweezers to apply silver leaf, let that dry then repeated the process another 2 times, to get layers, also when the hydro spirit gum dries it can create a great antique look. She then went in with a little more hydro spirit gum and applied some more of the same glitter used before.

Next up she applied mascara using a small fan brush as you need to be really delicate applying mascara will all the glitter and silver leaf on the eyes, therefore a mascara spool would be to clumpy.
Branka then applied a lip colour; she used black from mist effects. She did an over exaggerated cupids bow. 


1. My side of the face

2. Head on (my side is the one with pink on the nose)

Products used to create my look (right hand side of the face):

- MAC studio fix fluid foundation

- Derma palette to conceal

- Make-up Forever flash palette to create all the colour on the face and lips! 

- A little brow gel to define brows

- Sequins stuck to the face using eyelash glue

- Face Glitter applied to the face using hydro spirit gum.

- A small amount of MAC Haute & Naughty mascara to the upper lashes.

Lesson Evaluation:

I really enjoyed working free hand today, it made a nice change from sticking to a step by step guide. I loved having the freedom which I was quite surprised at because usually I get nervous when given no direction, but I surprised myself; once I have drawn the first line, I just carried on and on!
Looking back at the pictures I think my lines could have been cleaner, as I think they look a bit messy! Overall though I really enjoyed myself and can't wait to do more of this sort of thing. 

24.02.15 Hair!

So today was scheduled in as a workshop in our timetables, so we could practice for our photographic shoot but myself and another classmate had already done our shoot so our teacher Emma Croombs told us we could work in a pair on another classmate, create a hairstyle, then test the outdoors conditions, as if we were actually on location. So we could learn what it would be like bringing the Great British elements into play!

We decided to create a big twist at the back with two victory rolls at the front. Here are our results:

Our model for the day with natural hair.

Back left view of roll

Back right view of the roll

View of victory rolls mine is the one closest to the camera.
How to create the look:

- You want to start off by brushing through your models hair.

- Preferably you would want to put a directional set in your models hair using carmen rollers... but... we didn't do this so in fact made it harder for ourselves!!

- You want to make a clean straight parting we chose to do a side parting, therefore having one victory roll bigger than the other. 

- Then using a pintail comb you want to create two sections from the ear to the parting line you just created on both sides. 

- Take whatever section you are starting with and brush through you want you hold the length of hair up and make sure your tension is tight, so you don't get any sagging! 

- Back comb the section using a postiche brush.

- Wrap the end of the hair around your fingers then roll up until you have rolled the entire length of hair. Spray with hairspray and use your pintail comb to bring in any stray hairs. 

- Carefully slip your fingers out from the roll and use both hands to tease the roll out length ways till your happy, secure the roll to the head using grips on the inside of the roll so they're not visible.

-Repeat process on the other section.

- On the back of the head it's just one big section, so is quite difficult. 

- We started off by back combing the section, the smoothing using a postiche brush.

- We swept the hair to the left then cross gripped down the length of the section so the hair is tight and clean on the head. 

- We then took crepe hair and created a long sausage shape and wrapped the hair around it, in order for our roll to not only have maximum stability to hold it's shape when on location or if it has to stay in for long periods of time. When your rolling make sure your rolling tighter and upwards slightly so you get the classic ice cream cone shape! Secure using grips- make sure they are hidden!!

- Spray with more hair spray

Lesson Evaluation:

Overall I'm really happy with the style we created especially seeing as our model has the straightest, softest hair so it literally holds nothing for long, and the fact we didn't use carmen rollers! When we went outside for 20 mins to experience what its like when your hairstyle is out in the open, I thought we did really well, we had everything we need and were able to maintain the style until we had to return. We remembered to take everything we may have needed, so we didn't get stuck at all. Really good lesson overall.

10.02.15/03.03.15 Cage work in hair...

Working with wire...

So today we had to create a shape using wire or wire mesh or both! I ended up using both wire and the metal mesh as there wasn't enough of either to use it solely. 

I created 3 triangles, I then wrapped crepe hair around the wire to bulk it out, so it would look better when I wrapped the dolly head hair around it later. It also makes it easier to secure to the head.

I then separated the front sections of the hair and secured them with a sectioning clip away from the face. I the created anchors along the section to secure the wire triangles to. 

I then took secured my triangles to the anchors I had created using a cross grip technique.

Once I had done this I was able to take sections of hair from behind the triangles and wrap around.

I then took the front sections of hair that I had previously clipped away from the face through the two triangles. 

Lesson Evaluation:

Overall I wasn't happy with my final look, the dolly heads hair is super thin so I found it really difficult to wrap around the triangles I created, if I had to do this for a catwalk show, I would make the triangles and have them wrapped in hair extensions, before the show itself so all you had to do was secure them onto the model on the day, I feel this would save so much time, also it would give continuity as everyone had difference density, and lengths of hair, so they don't all look different! 

Apart from that I was pretty happy with everything!


Side view


Mirror view

Sunday, 22 February 2015

Photographic shoot!

Shoot Day!

So today I had my photo shoot, I planned to arrive at 10 have a little chat with the photographer and get set up in time for the arrival of my model at the studio for 10.30. I showed him the mood board I took with me so he could get a jist of exactly what I wanted to achieve.

 My mood board


I arrived with Charlotte and her model, we set up, then my model arrived!

I introduced myself and asked her if she needed a drink or to use the bathroom before we started. I wanted to make sure she was as comfortable with me as possible as we were complete strangers!

Before the shoot day I made sure my model had no allergies and that she was ok with the look and products I wanted to use, she told me she had no allergies and was fine so that was good, it meant that I didn't need to change anything I had planned. I told her to come wearing some sort of bottoms as I had a shirt for her to wear as it was only a head and shoulder shot, I just wanted to make sure she didn't turn up in a dress or a jump suit as then she wouldn't of been able to put the shirt on without taking everything off! 

I brought everything I think I would need in a clear set bag from PAM, I chose to bring this instead of a case as I didn't know how big or small the studio would be, and if I would have a space to set out my kit, so by bringing the clear bag I could see where everything was, and easily accessible. I'm glad I did as there was only a small round table and there were two of us that needed to work on it. I brought 2 false flowers for the shoot, one a wine red rose and the other a bright red carnation, just like the ones in the D&G SS15 catwalk.

I decided to start on the hair first:

- I brushed through her hair then section by section I curled it using my own curling wand. I sprayed each curl with Schwartzkopf extreme hold hairspray it is my absolute favourite hairspray and the only one i find that actually holds the style, especially if you have hair like mine which drops instantly! The hair was pretty stiff at this point but that's how I wanted it whilst I did the make-up so it keeps it's curl, I dressed it out properly at the end.

- I started by cleansing my models skin as she was wearing a light amount of foundation as she'd had a break out, she also had leftover mascara and eyeliner from the night before, she told me as it was water proof she struggled to remove it. I used Garnier micellar cleansing water which is hypo-allergenic and can be used on all areas of the face including the eyes. I removed the make-up from her face and her mascara using a cotton pad, then remove the eyeliner along both her bottom and lower lash line using a cotton bud, with the cleansing water. I then applied an oil free moisturiser all over her face using my hands which of course I checked with my model first to see if it was ok, I chose to use an oil free moisturiser as I noticed my model had quite oily skin.

- I then applied MAC studio fix fluid in shade NC15 as it was a perfect colour match. I applied using a foundation brush then buffed in using a bronzer brush, I find this technique works really well when you want to achieve a flawless skin look.

- I then applied concealer I used my La Maquillage palette to conceal, my model had quite yellow undertones with a touch of pink, so I mixed the lightest beige shade, with the yellow, and a tiny bit of the peachy pink. I applied to around the nose, the forehead and under the eyes, I used a concealer brush then buffed in using the same bronzer brush from before.

- Next I did the contour; I used the light brown colour from my La Maquillage palette. I applied using the same foundation brush to the cheekbones, down the sides of the nose and up to the brow, to the temples and along the jawline I then buffed in using the same bronzer brush. 

- I then mixed a highlight colour by using a bit of my foundation colour combined with a small amount of white grease paint. I applied to the forehead, down the bridge of the nose, to the chin, on the brow bone, on top of the contour line, I then blended it all in using the same bronzer brush but made sure I cleaned off the contour colour with IPA first.

- I then applied prep and prime translucent powder from MAC all over the face using a powder brush, as my models skin was quite oily I felt this was the best decision. 

- I then applied a dark blush colour from MAC to apples of the cheeks, and then applied a bronzer along the cheek bone and blended together.

- I then brushed through the brows, then filled in using my Ben Nye Colour shadow palette, I combined colours black brown and cocoa brows to match my models natural colour. I filled in using a small angle brush. I then sharpened the outline of the brows using a eyebrow pencil from MAC; to get the really sharp and defined. I didn't have any brow gel so I applied a small amount of Vaseline to a mascara spool and brush through the brows, I thought this would look really good under the studio lights and give off a nice shine in my shot.

- Now for the eyes my original plan was to keep my models top lashes her own, but apply lots of mascara then clump lashes into groups as seen at Rochas SS15 show, then do the look seen at Nanette Lepore's SS15 show; white liner applied along the lower lash line to make the eye appear bigger then apply false lashes along the 'new lash line' created with the liner.

-I held the false lashes I had brought with me on the bottom of the eye and I just wasn't happy with how it looked so I thought on my feet and decided to place the false lashes on the upper lash line, I then applied a white pencil liner from Kryolan along the lower lash line, bringing the line right to the inner corner and round to the top lash line, and the outer edge into a flick pointing downwards. I then applied alot of mascara to my models lower lashes as they were really long anyway. I then applied a dark brown shadow from Ben Nye using a small thin brush along the upper lash line, I used a mini smudger brush to blend and soften the line. 

- I then applied cherry red lip liner from MAC around the lips, and filled in the corners as this is the place lipstick fades from first. I then used my Kryolan lip palette, to create a dark red colour, I mixed a dark red and a little dark purple together and applied to the lips using a lip brush, I applied a few coats as I find it more of a lip stain/gloss and II wanted it to be really bold like it was a D&G's SS15 show. 

- I then used MAC vanilla pigment to highlight under the browns, down the bridge of the nose, on the apples of the cheeks, in the cupids bow and the chin.

- I then finished off the hair; i brushed through the curls gently making sure not to pull on the hair too much so I didn't pull out the curls, I just wanted to lose the 'crispiness' from the hairspray. After I had done this I wrapped some of the curls around my finger to define them again. I then applied Schwartzkopf volumizing root lift powder, to the roots of my models hair as it was quite fine and flat, I then sprayed salt spray throughout the hair, making sure I was moving the hair as I did it, to ensure even coverage. 

- The last thing I did was paint my models right hand finger nails with a red nail varnish, as this was the hand that will be in my shot, holding the flower accessory over her right eye. 

- I then asked my model to change into a dark green chiffon shirt I had brought for her, I chose this colour as I thought it would compliment the reds of my lip, flower and nails. 

Time to shoot!

My photographer gave us a choice of a white background and a charcoal grey one, I chose the charcoal grey as I thought it was more i-D magazine, and I didn't want the white and red combo along with a red English rose, giving the wrong impression, I think it would have look more world cup patriotism, rather than SS15 fashion. The grey just looked more chic and complemented my look alot better. 

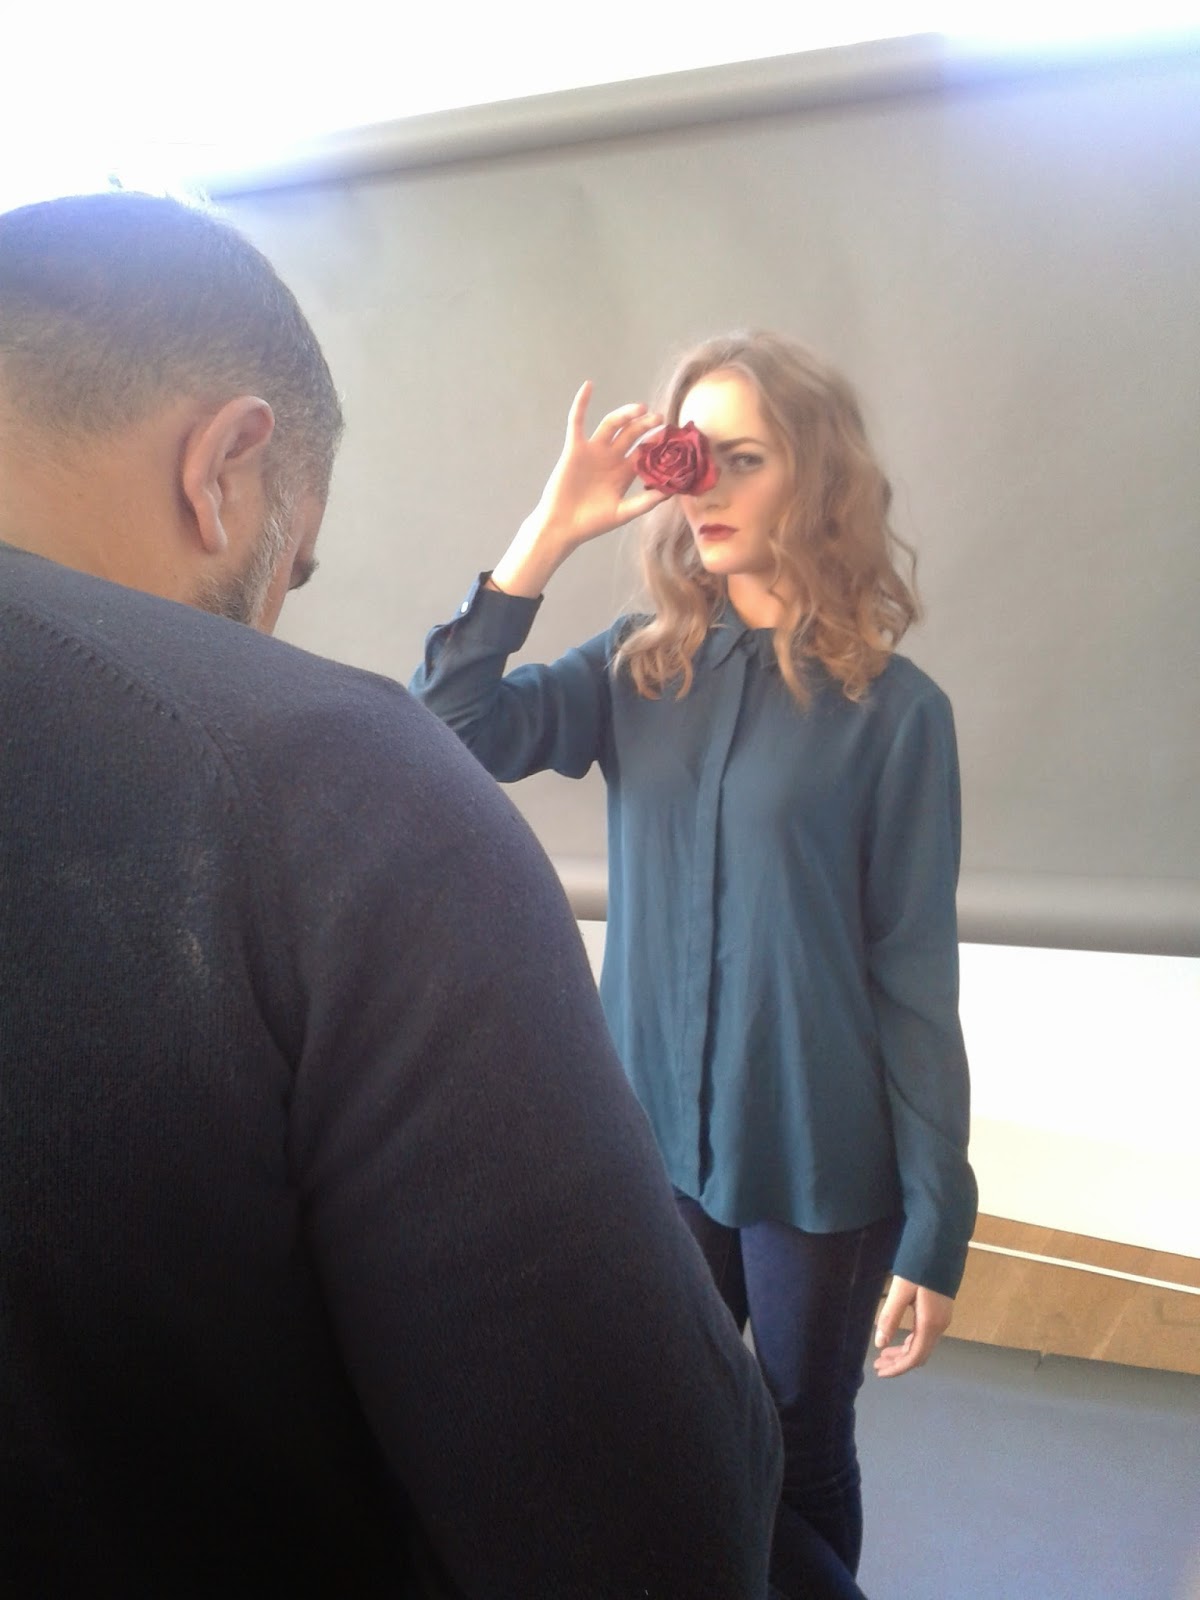
I told my model just to have fun really look into the camera, because front covers have to catch your eye; I wanted my model to look as if she is staring at the reader, drawing them in. The first prop I gave her was the rose, I'm really glad I decided to use props to cover the eyes as my model couldn't really wink! Something I never thought of being an issue! Pedro (photographer) thought the light should be hitting the right side of the face (where the flower was) to create a shadow over the left side of the face. The shots were looking really good so I was happy. 

I also got her to use her hand to cover her right eye, to show off the nails.

I then got my red carnation prop, I got my model to place her right arm across her head and position the flower over her left eye which also looked really good, I'm going to have a tough time choosing the final shot!

My model was amazing she switched when she was in front of the camera, and knew how to work it, she was quite shy in person, but oozed confidence when the camera was on her.

I pinned the models hair back at one point so the photographer could get a full face shot of the make-up, without the hair on the face. It's quite a good thing actually as the shots with the hair pinned back will be quite good to put on this blog to show my make-up application.

Overall I was so happy with how everything went, I'm really proud of myself for arranging the shoot, and recruiting a studio space, model, and photographer. Also of my planning, time management, and make-up application on the day! I can't wait to see the final photos!!

Problem solving

I noticed that my models hand holding the flower was limp, so I asked her to make an elegant shape when holding the rose so the image didn't look sloppy, after she did this it looked so much better!

Another thing I noticed was fly away hair showing up on the camera, so I went in and used my postiche brush to smooth down the top of the hair, and secured it with a little hairspray. 

Below are some behind the scenes pictures of my shoot:


Flower props I used on my shoot


Planning my photographic shoot

When we were told that we had to organise a whole shoot ourselves outside of college in our own time, I think my heart stopped for a bit. I was so nervous to go out and source a photographer, model and a studio space!

When I got home I tried to think of friends who were photographers but I couldn't think of anyone, and then I thought about the model, I have some extremely beautiful friends, but I really felt for this shoot that I wanted someone who is comfortable in front of the camera and knows how to work it, also someone who knows there best angles, and the most important thing I want in the shoot is confidence. Now despite my friends being good looking I'm not sure how much confident they would be, for a fashion shoot.

Our tutor Branka told us about 2 sites which are really good for sourcing models, photographers, stylists etc, also great to promote yourself and your own work. These were http://www.starnow.co.uk/ and http://www.modelmayhem.com/. I checked them out, star now isn't free to join but when I signed up they checked with my uni and tutor Branka that I was who I said I was before I was allowed to be a member, which I really liked as that's the main worry I've had is safety with organising this shoot. Models mayhem didn't do this and its free, so that could be better for some people but for people like me; who are extremely cautious I took the safer option even if it does mean paying a fee!

I posted an advertisement on star-now, looking for a model and photographer, I wrote down the brief in short and requested that I'd prefer the photographer to have a studio space. I also stated that it would be unpaid, a collaboration between the 3 of us, so all of us would have the photos for our portfolios, and we would all be credited wherever the photos are shared and displayed. 

I couldn't believe the responses! I had loads, so noew I had the problem of having too many options, rather than before when I was worrying about having no-body.

Charlotte Spencer and I; a girl from my class decided to do the shoot together, because of safety reasons. 

I ended up finding a photographer called Pedro Garcia who had a studio space on the Goldhawk road, and was happy to do 2 shoots in one day. I also found my perfect model for the look I wanted to do. We arranged the shoot date for 10am on Wednesday 18th February. This was the best date for myself and my classmate as it was during our study week so we would have plenty of time to prepare and get organised.

I'm really excited I cannot wait!!